WebGPU game (#4): Depth and Instances
For today’s post, I’d like to cover two more rendering topics that get us closer to the point that we can focus on making a game out of this project: depth and instances.
Depth buffer
The question we now have to ask ourselves is: how does the graphics card know which triangles are in front? The answer is that the information is available from the NDC coordinates, but you need to configure a buffer to store this information. If you don’t, you get the following:
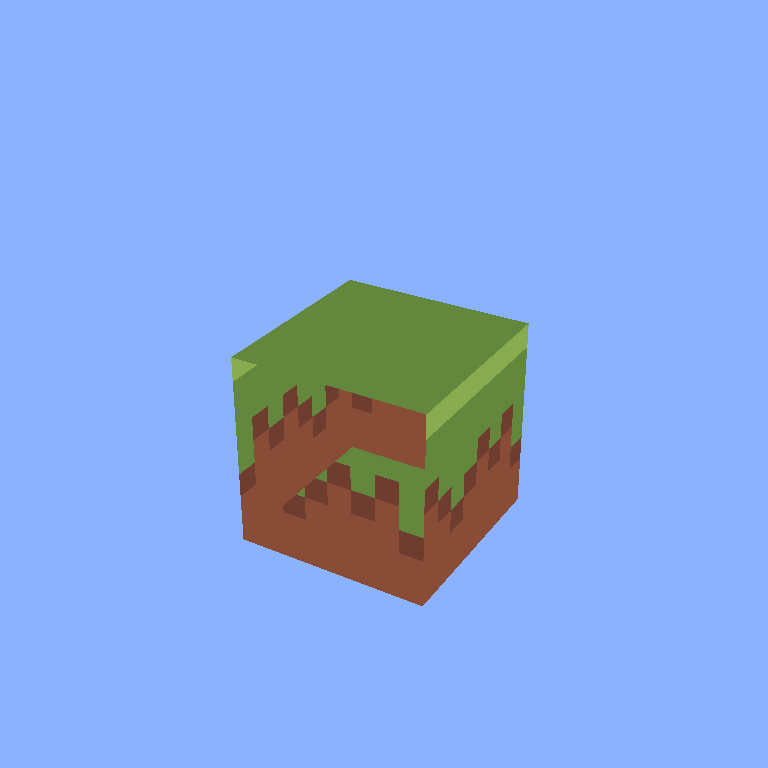
We’re essentially seeing triangles rendered in order (roughly – your GPU can also just reorder triangle processing for parallelization purposes). Let’s reproduce this issue, first, by defining a cube1. We remove the old vertices and update the indices as follows:
const cube = [
  // x, y, z, u, v, atlas index
  // front
  [-0.5, -0.5, 0.5, 0.0, 1.0, 3],
  [0.5, -0.5, 0.5, 1.0, 1.0, 3],
  [0.5, 0.5, 0.5, 1.0, 0.0, 3],
  [-0.5, 0.5, 0.5, 0.0, 0.0, 3],

  // back
  [0.5, -0.5, -0.5, 0.0, 1.0, 3],
  [-0.5, -0.5, -0.5, 1.0, 1.0, 3],
  [-0.5, 0.5, -0.5, 1.0, 0.0, 3],
  [0.5, 0.5, -0.5, 0.0, 0.0, 3],

  // right
  [0.5, -0.5, 0.5, 0.0, 1.0, 3],
  [0.5, -0.5, -0.5, 1.0, 1.0, 3],
  [0.5, 0.5, -0.5, 1.0, 0.0, 3],
  [0.5, 0.5, 0.5, 0.0, 0.0, 3],

  // left
  [-0.5, -0.5, -0.5, 0.0, 1.0, 3],
  [-0.5, -0.5, 0.5, 1.0, 1.0, 3],
  [-0.5, 0.5, 0.5, 1.0, 0.0, 3],
  [-0.5, 0.5, -0.5, 0.0, 0.0, 3],

  // top
  [-0.5, 0.5, 0.5, 0.0, 1.0, 2],
  [0.5, 0.5, 0.5, 1.0, 1.0, 2],
  [0.5, 0.5, -0.5, 1.0, 0.0, 2],
  [-0.5, 0.5, -0.5, 0.0, 0.0, 2],
];

const vertices = new Float32Array(cube.map(values => {
  return [
      values[0],
      values[1],
      values[2],
      ...uvFromIndex(values[5], values[3], values[4], texture),
  ];
}).flat());

...

// We are working with quads, so we can map our indices to multiples of 4 vertices.
const planes = cube.length / 4;
const indices = new Uint32Array(Array.from({length: planes}).map((_, i) => ([
  0, 1, 2, 0, 2, 3
]).map(x => x + i * 4)).flat());
You should see the same issue as pictured above. Now, we can solve this for convex models by turning on back-face culling. Back-face culling essentially allows the graphics card to eliminate a triangle as a candidate for rasterization quite cheaply. I’m going to solve the general case which resolves this issue for scenes with multiple and concave models. At the end of this section we can turn on back-face culling as an optimization2.
For our depth information, we’re going to use a texture instead of an opaque
primitive buffer. I’m not actually sure why this is the convention, but I assume
it’s because the buffer does actually represent values at specific pixels in 2D
space. For this, we can define a helper method in our texture.ts file:
export async function createDepthTexture(
  device: GPUDevice,
  width: number,
  height: number
): Promise<GPUTexture> {
  const textureDescriptor: GPUTextureDescriptor = {
    label: "depth texture",
    size: { width: width, height: height },
    usage: GPUTextureUsage.TEXTURE_BINDING | GPUTextureUsage.COPY_DST | GPUTextureUsage.RENDER_ATTACHMENT,
    format: "depth32float",
  };

  const texture = device.createTexture(textureDescriptor);

  return texture;
}
We can then create our depth texture and a view into that texture.
const depthTexture = await createDepthTexture(device, SCREEN_WIDTH, SCREEN_HEIGHT);
const depthView = depthTexture.createView();
I’ve updated the camera to be a bit higher up (by 3 units) and looking down at the scene by 0.5 radians.
const camera = new Camera(new Vec3(0, 3, 5));
camera.pitch = -0.5;
Now, we need to update our pipeline descriptor with the depthStencil
information. You can ignore the “stencil”3 part of the name for the purpose
of this series, I don’t intend to use it. Otherwise, we’re specifying that
render passes should write to the depth buffer, and only when the new fragment
has a depth value less than the old one. Otherwise, we just specify the format
of the buffer (same as the format specified in the createDepthTexture
function).
const pipeline = device.createRenderPipeline({
  ...
  depthStencil: {
    depthCompare: "less",
    depthWriteEnabled: true,
    format: "depth32float",
  },
});
For our render pass we specify the actual attachment with a clear value of 1.0, since we assume values near zero are closest to the camera. We also specify that the depth buffer should be cleared on the start of each pass and the values should be stored after the pass. We may want to use the depth texture in subsequent passes.
const pass = encoder.beginRenderPass({
  ...
  depthStencilAttachment: {
    view: depthView,
    depthClearValue: 1,
    depthLoadOp: "clear",
    depthStoreOp: "store",
  },
});
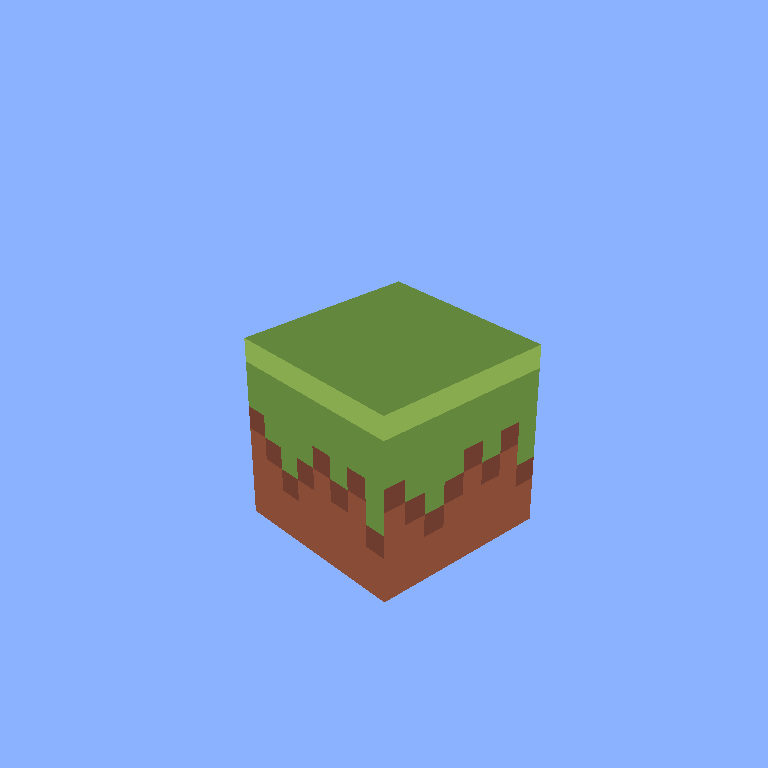
Finally, we can enable back-face culling back in our pipeline definition as an
optimization. Visually, this changes nothing. If you’d like, remove the
depthStencil configuration and depthStencilAttachment temporarily to see how
back-back culling actually resolves the issue for this simple cube. Or, switch
the cullMode to "front" to see only the inside of the cube rendered! The
normal direction is determined via the “winding” of the triangle, not an
explicitly provided normal. You’ll now notice I specified all of the triangles
using a counter-clockwise winding4.
const pipeline = device.createRenderPipeline({
  ...
  primitive: {
    topology: "triangle-list",
    frontFace: "ccw",
    cullMode: "back",
  },
});
Instances
From the previous post, we implemented the view and projection matrices, but omitted the model matrix. The following sets up the buffer for use, but we’re just going to use an identity matrix, for now.
So, first, in the mat4.ts file add the following static method (if you haven’t
already):
static identity(): Mat4 {
  return new Mat4(
    1, 0, 0, 0,
    0, 1, 0, 0,
    0, 0, 1, 0,
    0, 0, 0, 1,
  );
}
We now need to create our model matrix (we’ll interchangeably use the word “instance” to describe this data).
const instance = new Float32Array(Mat4.identity().buffer());
const instanceBuffer = device.createBuffer({
  label: "instance buffer",
  size: instance.buffer.byteLength,
  usage: GPUBufferUsage.VERTEX | GPUBufferUsage.COPY_DST,
});
device.queue.writeBuffer(instanceBuffer, 0, instance);
Now, we need to define the layout for this buffer. WebGPU calls this a vertex
buffer layout, but you’ll notice the stepMode is defined as "instance". This
means that the same data is used for all vertices of a given
model/mesh/instance. I think it’s a called a GPUVertexBufferLayout because
it’s a buffer for the vertex shader, not because it necessarily represents
vertex data (citation needed).
const instanceBufferLayout: GPUVertexBufferLayout = {
  stepMode: "instance",
  arrayStride: 64,
  attributes: [
    {
      // column #1
      format: "float32x4",
      offset: 0,
      shaderLocation: 3,
    },
    {
      // column #2
      format: "float32x4",
      offset: 16,
      shaderLocation: 4,
    },
    {
      // column #3
      format: "float32x4",
      offset: 32,
      shaderLocation: 5,
    },
    {
      // column #4
      format: "float32x4",
      offset: 48,
      shaderLocation: 6,
    },
  ],
};
Painfully, I don’t think we have a natural way of providing a
matrix. So, we’ll stitch this back up in our shader. While we’re still in the
main.ts file, let’s update the “glue” – as I call it5.
const pipeline = device.createRenderPipeline({
  vertex: {
    ...
    buffers: [vertexBufferLayout, instanceBufferLayout], // updated
  },
  ...
});
Then, update the render pass to bind this new buffer:
pass.setVertexBuffer(1, instanceBuffer);
Finally, we can define this in the shader. We first add our struct which matches the buffer layout above:
struct InstanceInput {
  @location(3) model_matrix_0: vec4<f32>,
  @location(4) model_matrix_1: vec4<f32>,
  @location(5) model_matrix_2: vec4<f32>,
  @location(6) model_matrix_3: vec4<f32>,
}
We then update our vertex shader with a new instance input, stitch up a new
matrix, and use it in our completed MVP calculation!
@vertex
fn vertexMain(in: VertexInput, instance: InstanceInput) -> VertexOutput {
  var output: VertexOutput;
  let model = mat4x4f(
    instance.model_matrix_0,
    instance.model_matrix_1,
    instance.model_matrix_2,
    instance.model_matrix_3,
  );
  output.clip_pos = uniforms.viewProj * model * vec4f(in.pos.xyz, 1);
  output.uv = in.uv;
  return output;
}
Oh, nothing has changed…
Right, for some feeling of progress, mess around with your identity matrix. Double one of the values, apply a transformation. Just remember to avoid shear transformations and put things back where they were, otherwise…
Footnotes
-
Except for the bottom face – I’m lazy and it will just cause more GPU cycles for no reason. I may even remove two more faces we’ll never see, moving forward. ↩
-
In fact, I believe it can be achieved with a single cross product, dot product and comparison. This is cheaper than a single run of the fragment shader in most games with any lighting calculations. ↩
-
But for completeness: https://en.wikipedia.org/wiki/Stencil_buffer ↩
-
Misdirection is better suited to magicians, I apologize for the deceit. ↩
-
I often forget where exactly to bind things with this API. Don’t feel bad repeatedly referring back to the same documentation (or type definitions), I shamelessly don’t! ↩